
The power of sealing gaps - insulation AND air leakage

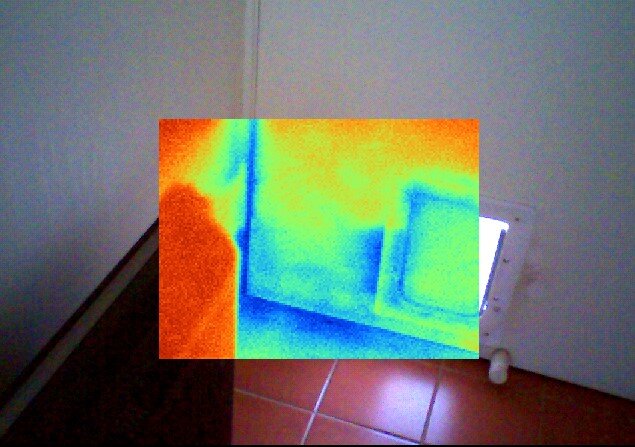
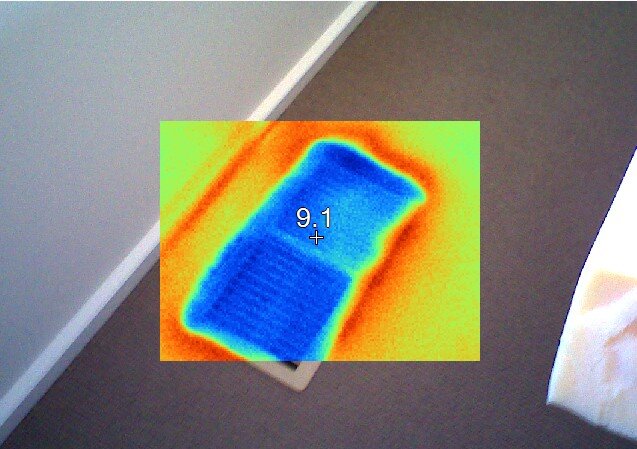
Thermal image of a puppy trying to stay warm on a cold August day.
This client (not the dog, but their human) had a very common story — an older double brick home in Canberra with a brick veneer extension. The ceiling in the original part of the house was insulated, but the ceiling in the flat-roofed extension was not. The brick veneer walls were fitted with insulation, but the double brick walls were not. It was difficult to retain heat in winter, and parts of the home were too hot in summer, too cold in winter and uncomfortable for much of the year!
The owner was keen to explore whether the thermal comfort of their home could be improved through simple, inexpensive measures. We know, from testing 100s of Canberra homes over the last decade, that its not just insulation you need to worry about, but, also airtightness. These two things often get confused, or lumped in as one when talking about “improving the thermal performance of your building envelope” (as building science nerds like us tend to do, sorry)! One without the other means you are missing out on improved comfort and reduced energy bills.
Insulation reduces conductive heat loss or gain. Imagine an airtight wall — heat still transfers through that wall but when it is insulated the movement of heat is slower. Draughts are direct gaps in the shell of your house through which air merrily passes (the lovely air you have paid to heat) — air gaps can cause your home to lose heat many, many, many times faster. Draught sealing is number one for thermal bang for buck! [It is also very important not to confuse airtightness with ventilation — both are critical. Houses need to be thought of holistically if you want them to be healthy. Jenny explains that more in this article].
So, back to the story, our science team was engaged to undertake an initial air leakage test, and then to retest once some improvements had been made. We knew where there was, and wasn’t, insulation so could already advise on retrofitting THAT aspect of the building envelope, without our insulation thermal imaging service (though we did check for gaps in the existing stuff).
Our initial blower door test found the home to be quite leaky at 21.9 air changes per hour (ACH) at 50 Pascals (Pa). To put this into perspective, if all the gaps in this home were combined, this rate of air leakage would equate to a 42.5cm x 42.5cm permanently open window!
As shocking as this sounds, this result is actually quite typical for a Canberra home, with the majority experiencing between 15-25 ACH@50 Pa. The air leakage standard introduced in the UK in 2006 aims for less than 10 ACH@50 Pa, and we believe this is what we should be aiming for in the Canberra climate. [In fact, the National Construction Code now says that new homes should achieve a level of airtightness of <10 m3/m2/hour — this is slightly different to ACH@50Pa but roughly equivalent]. This means many of us are living in draughty, uncomfortable homes that are costing us more to heat and cool than they should be. In our experience, the rate of air leakage has an almost linear relationship to the amount of energy used for heating over winter so halving your air leakage rate could halve the amount of energy you use to heat (AND you will feel loads more comfy because the air is not moving as much).
During the blower door test our thermal camera was used to help locate air leaks through the shell or envelope of the home (NOTE: a thermal camera does not actually visualise the leaking air, it only shows colour differences where the leaking air is cooling down, or heating up, a surface). We then prepared a report for the client which showed the results, identified the location of the leaks and provided advice on ways to reduce them. Once the client had sealed many of the air gaps, we were asked to re-test. The result was 11.52 ACH @ 50 Pa — a significant improvement!
The owner was impressed with the results and surprised by how much calmer and more comfortable the house felt just by sealing air gaps.
Results in detail
(First we show and tell you where the common problems are… scroll down to find our suggested fixes)
Location of air leaks
Here are the most common and significant sources of air leakage at this particular home (pics first, words below):
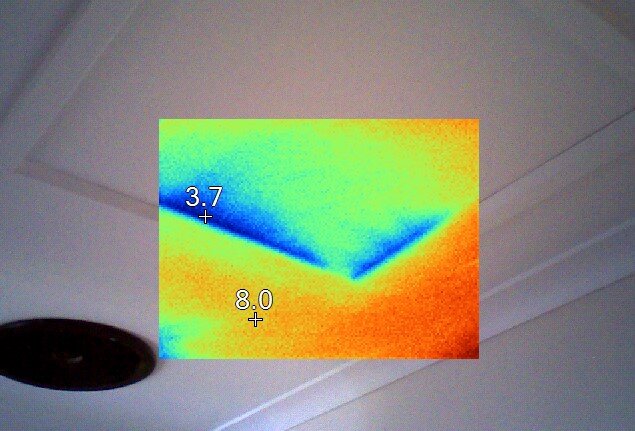
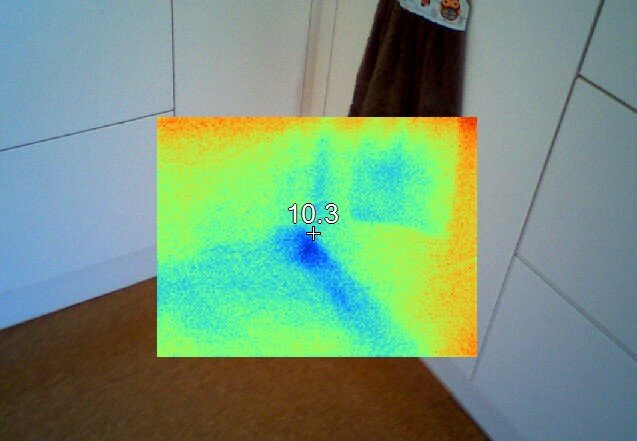
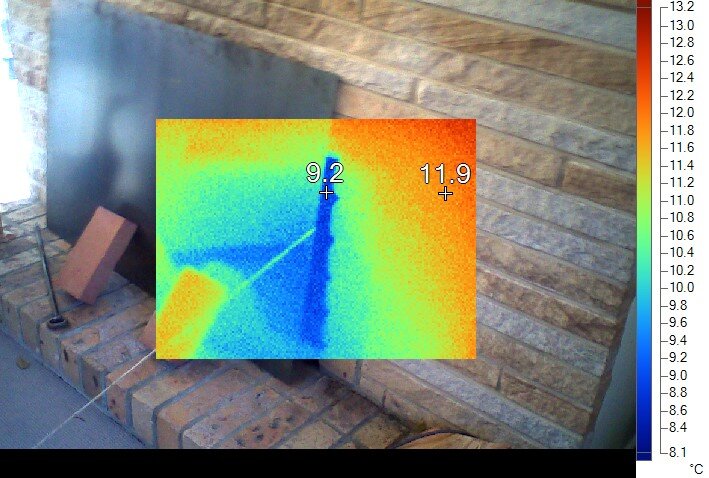
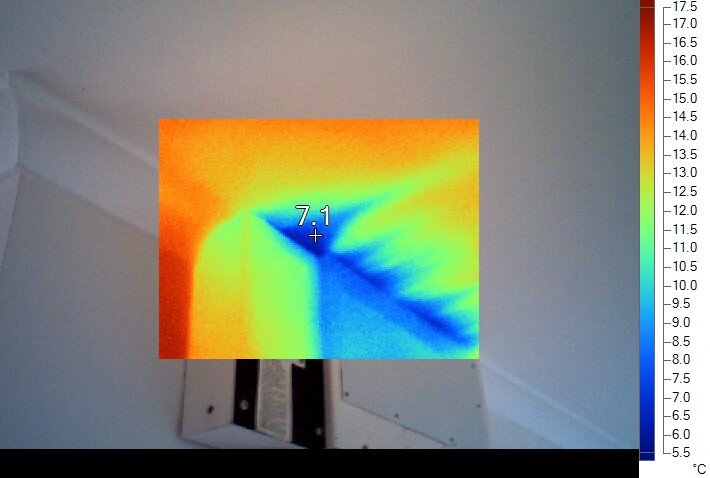
The infrared camera captures surface temperature differentials, so interpretation of the images is dependent on the temps at the time of assessment. At the time of this test the inside air temperature was 10.3˚C (cold!) and the outside temperature was 3.9˚C (colder!). Therefore in these images, the cooler air entering from outside causes the surrounding surfaces to appear blue.
Keep in mind, when we do a blower door test we cause air to flow in from outside. The opposite thing is happening in the higher parts of your home as you heat it over winter. Your lovely warm air is leaking out of the high air gaps and cold air is coming in from the low air gaps. Just slowing that air movement makes you feel oodles more comfortable.
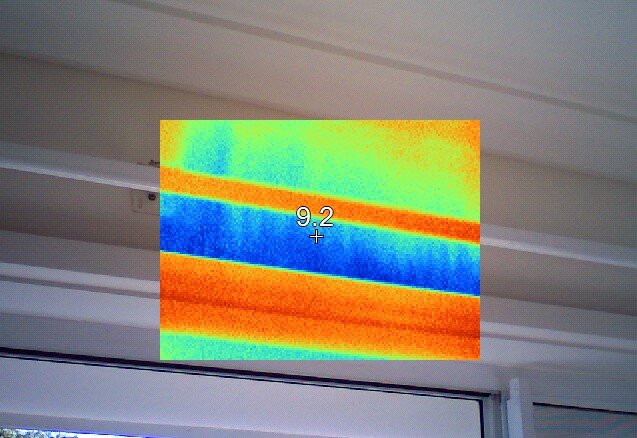
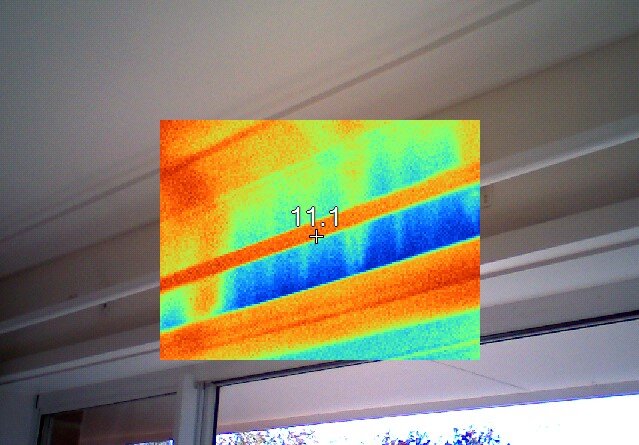

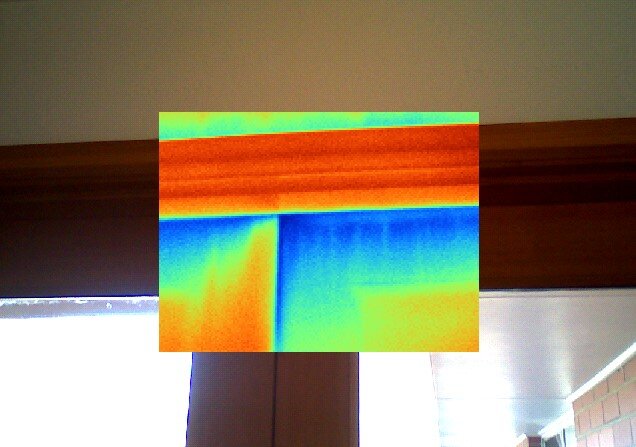
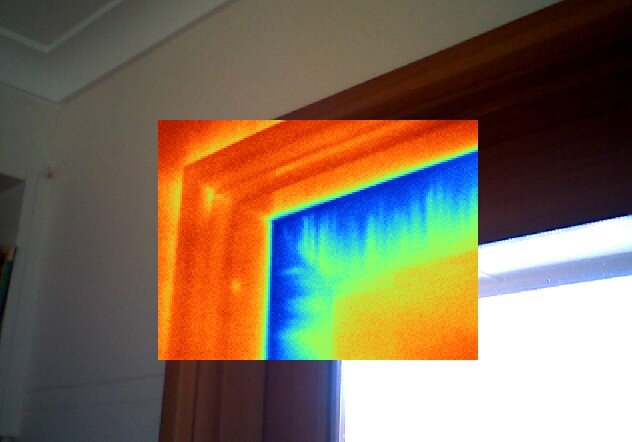
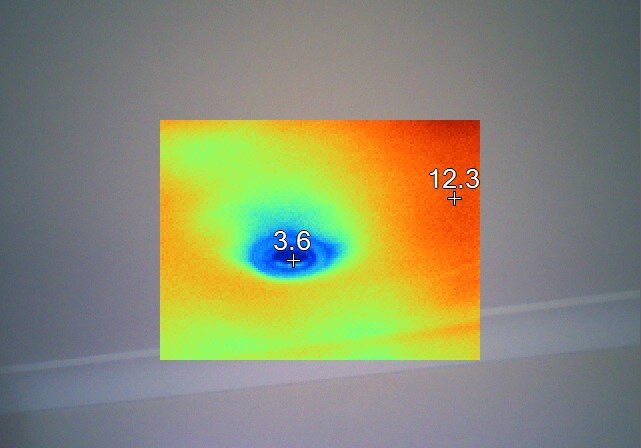
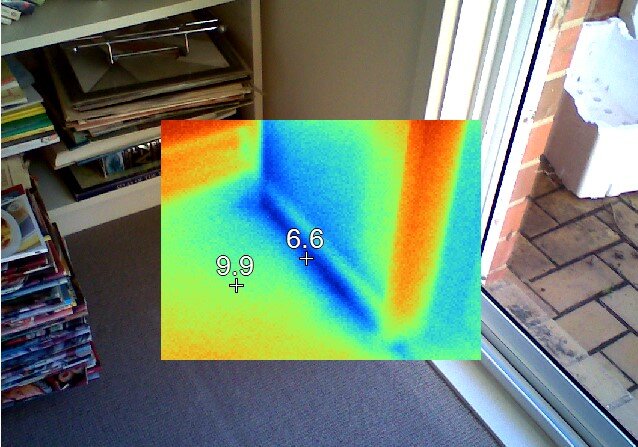
Behind architraves. It is very common to find gaps between architraves and the walls around windows and doors. These gaps can increase as a result of building movement. In this home many architraves had small to moderate gaps allowing heated air from inside to leak into the wall cavity and outside.
We challenge you to run your fingers around your window architraves — top and bottom is the worst.
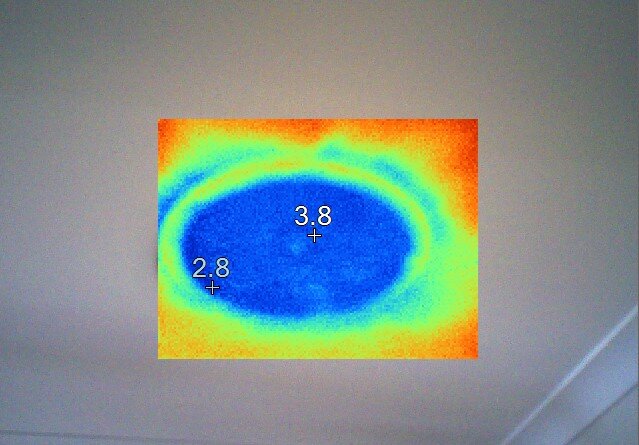
IXL tastics and exhaust fans. The old IXL tastic bathroom heaters were open holes to the roof space — a significant area of air leakage. The exhaust fan in the laundry was also an open hole into the ceiling cavity.
Have you got exhaust fans that are just open to the roof space?
Seals to external doors. There were no seals fitted to the front or laundry doors. The seals fitted to the double timber doors off the kitchen were poorly fitted, damaged and ineffective. These seals need to be fitted to the full surrounds of the doors.
Ceiling access hatch (who says they are just holes for men!). There was leakage around the edges of the ceiling hatch. If you have a ceiling access hatch it is bound to be leaky. Hopefully it is in a less important part of the house like the laundry.
Floor heating vents. The in-floor, central heating vents were not sealed to the floor and there were quite large gaps around them (connecting directly to the sub-floor space). These gaps allowing cold air to be drawn in from under the house at the same time as you have the heating on!
If you have ducted floor heating, pull up one of those metal covers and see for yourself. Is the ducting actually sealed around the edges or do you also have bonus freezing air coming in?Downlights. Old style halogen downlights have gaps open to the roof space (direct air leakage to the roof space!) and also require large clearances in the roof insulation to limit the risk of fire. This leads to a portion of the ceiling being uninsulated. A 5% reduction in insulation coverage creates a 50% loss in effectiveness of ceiling insulation.
Kitchen joinery. There was some minor leakage behind the kitchen joinery. Sometimes there can be huge leaks! If your kitchen is a terrifying place to be in bare feet then its probably becuase of air leaks under the cabinetry
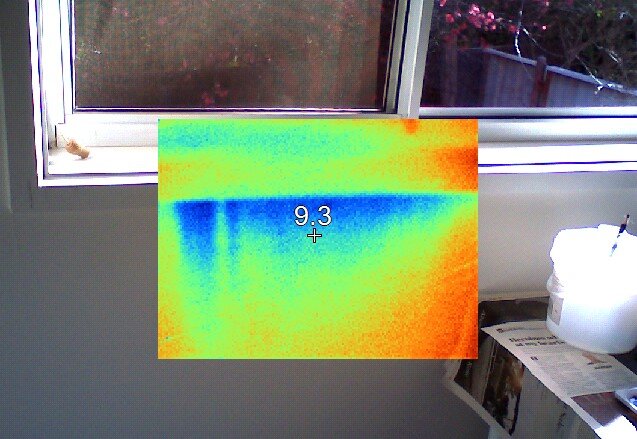
Window in living room. The rubber sealing had shrunk with age in an original aluminium single-glazed window leaving gaps and significant leakage around the glass.
Fireplace. The fireplace was sealed relatively well with only minimal leakage evident when the damper was closed. Sometimes fireplace dampers are hopeless and fireplaces can be a MAJOR source of air leakage.
Skirtings. The skirtings throughout the home showed some leakage. This was most noticeable in carpeted rooms with cold air passing through the carpet. Sometime when we test older homes the carpet actually bubbles up!
Power circuit box. A new circuit box had been installed below the original box with cabling running from the original box to the new. There were large holes in the ceiling behind the original box which was allowing significant airflow from the ceiling space.
Suggested Fixes
Our report included the following suggestions (scroll to the bottom for other draught sealing resources):
Architraves. The gaps between architraves and walls above windows and doors should be caulked with a quality flexible caulking product. This should be done around all windows and doors. Even small gaps create air leakage. Check out this great article.
IXL tastics and exhaust fans. As the exhaust fans in these units are undampered they should either be replaced with units that have integrated dampers, or have a retrofit damper installed.
Door seals. New door seals should be fitted to the laundry and front doors. Compressible rubber seals should be fitted rather than foam seals. Test for fit prior to installation to ensure your doors will still close correctly.
Ceiling hatch. The edges of the ceiling hatch should have rubber seals fitted to it.
Downlights. The halogen downlights should be replaced with new LED downlights that are sealed and rated to have insulation installed over them.
Floor heating vents. The gaps between the flooring and the heating ducting should be sealed. Ideally, the ducting should be fixed in more locations to the adjacent flooring with any remaining gaps filled with foam backing rod (for larger gaps where required) and silicone.
Living room window. The gaps around the glazing could be filled with glazing silicone.
Fireplace. If the fireplace is not used it should be sealed off completely or removed and the wall repaired.
Skirtings. The carpet would need to be lifted and the junction between skirtings and floor sealed with caulking to rectify these leaks. As the leakage is minor this would be optional. If the subfloor space was insulated with spray foam insulation the leakage issue should be removed as the foam will also seal the subfloor space.
Internal power circuit box. The original power box should be removed by a qualified electrician, and the cable entry points sealed more appropriately.
Other Handy Draught Sealing & Energy Efficiency Resources
GIY Green-It-Yourself draught sealing videos https://www.greenityourself.com.au
Make the Switch - great info about moving from gas to electricity https://maketheswitch.org.au
ACTSmart ACT Gov advisory services https://www.actsmart.act.gov.au
My Efficient Electric Home Facebook group https://m.facebook.com/groups/MyEfficientElectricHome/
EcoMaster https://ecomasterstore.com.au/collections/diy-draught-proofing
Renew magazine articles https://renew.org.au/renew-magazine/buyers-guides/draught-sealing-guide/
Energy Efficiency Matrix https://efficiencymatrix.com/